Making Toyz (Filmstrips, 2019)
So I can stop forgetting how I did it. :D
I use Photoshop CC, LNZPro, Tinker, and a hex editor (HxD, Hex Workshop, etc.).
Always have backups of the original toys. Make backups of your toys along the way so you can revert if you make a mistake in the hex editor.
Remember to not have your toy open in multiple programs at once, or it won't save properly and you'll have to do that step over again. Don't make my mistakes that I can't seem to stop making.
First, let me say that I do the unthinkble and rip toys directly from Google images. Now you know.
Google is an excellent source for toy bases. The best part is that we can actually use the crappy low-res images we are given from Google and pet store websites.
So do a search, save some toys you like, and forgive yourself.

Making the toy images
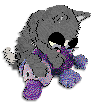
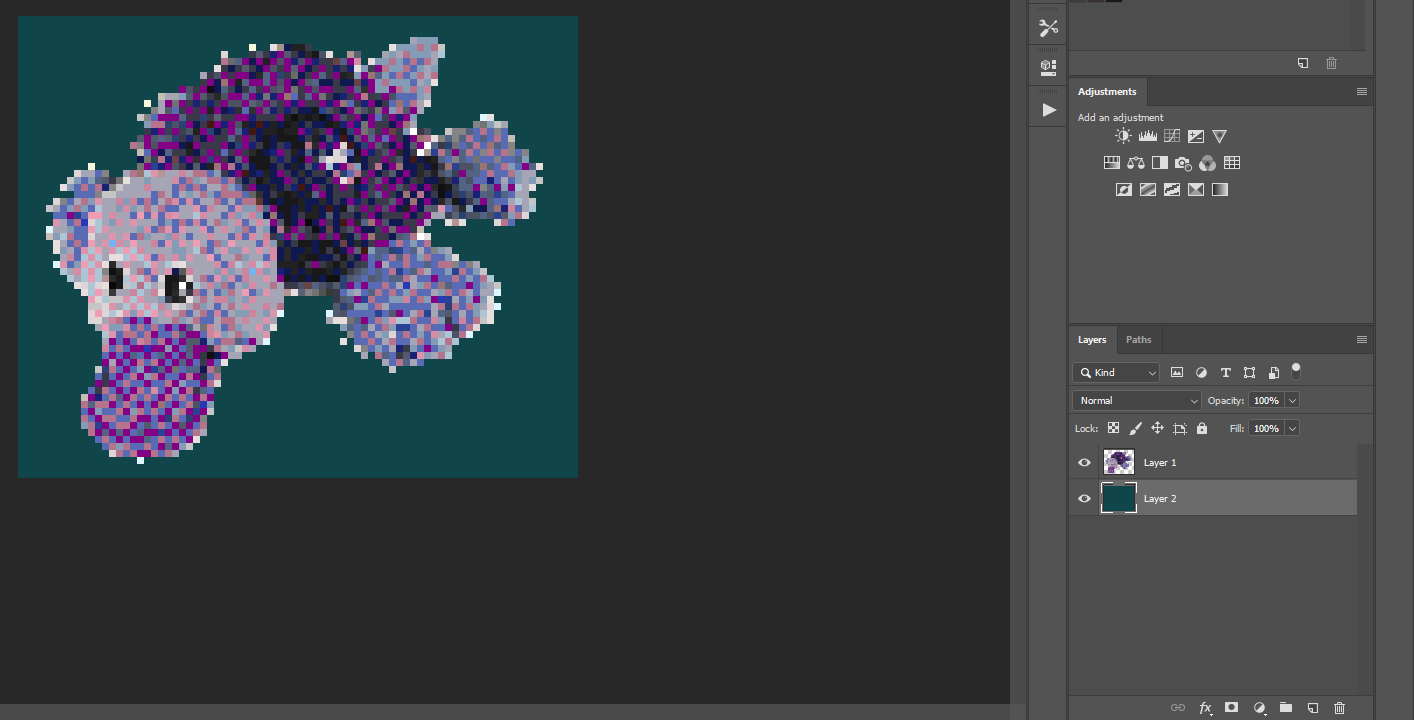
I start by making the "filmstrips". These are simply .pngs or .gifs we will load into Tinker later. They can be a single static image, or you can go all out making frames for animation.Open your image in whatever graphics software you like. I use Photoshop CC, which is important to me because it makes converting the image to "petz colors" extremely easy.

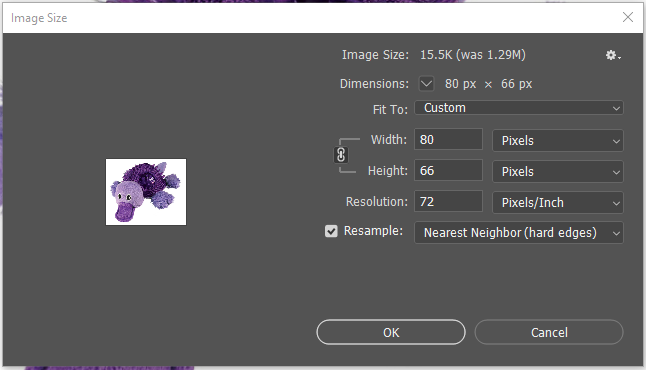
You may want to crop any gratuitous white space around the toy, but leave yourself enough room to give the image some movement later on.
Downsize the image to whatever toyz-size you want. Most of my plushies are around 80-100 pixels on the longest side. I choose Nearest Neighbor resampling to reduce fuzziness from jpegs and make clean up easier.
Go to Image > Mode > Indexed Color. In Palette, choose Custom. It will pop up the color table. Choose Load. Load this petz palette file. Click OK.
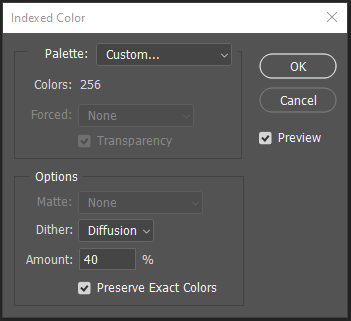
Now you can play with the Dither settings to achieve a look you like. Petz is a low-res game so I try to make my toyz match. I generally use Diffuse at a range of percentages, it just depends on the toy. Pattern can look nice as well.
I don't know how to do that step outside of Photoshop. You could of course do it by hand in something as simple as MS Paint. If you have another method please feel free to contribute and I will add it here.
You now have a nice, petzy-looking pixel art image.
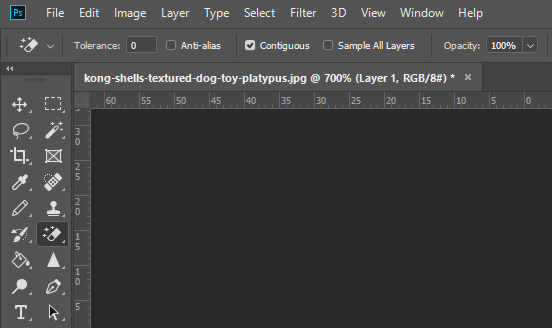
Choose Image > Mode > RGB color so we can erase the background. I use the Magic Eraser with Tolerance: 0, anti-alias unchecked, contiguous checked, sample all layers unchecked, and opacity 100%. Click in the white space to remove the background.
Make a new layer under your toy, and fill it with contrasting color. Erase any white/light bits around the edges to give your toy a clean look. Reference the original toy. Fuzzy toys can be tedious.
I then like to add some black partial outlines like the original Petz toyz have. These tend to be on long edges, or around important bits like the face or protruding parts to give some dimension to the toy. Use your best judgement.
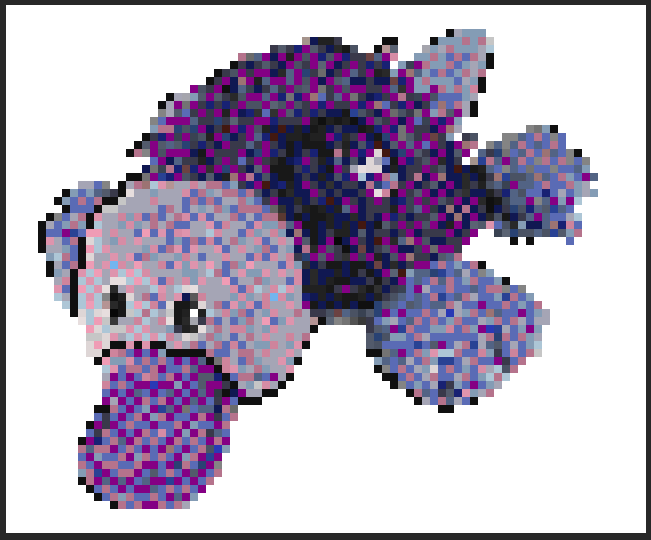

Remove your background layer and save your image as a .png or .gif.
You can stop here and move on. That is a perfectly fine and good option.
If you're extra and want to add some frames of animation, you would do it now. I'm not going to get into animation here, because there are plenty of pixel art animation tutorials out there. Read/watch those, observe some of the original toy animations in Tinker, and use your best judgement. I only add a few pixels worth of movement to mine and it takes a while, so feel free to not.
Finally, take your finished toy image and make a copy of it, resized to about 36-40 pixels on the longest size, and save it as yourtoyhere_away. This is your toy closet image.
We are done with Photoshop.
Editing in LNZPro
Open LNZPro.Choose a toy from Resource/Toyz to be your base. I use the Chewy Sneaker, Wool Chew Toy, and Dog or Cat Plush often, because I typically make chew toys and plushies. Choose a toy that is similar to the type of toy you made.
File > Save As > and save your toy with a new name in the Toyz folder. It will pop up the Save New Breedfile dialogue, just pick "Make a new breed".
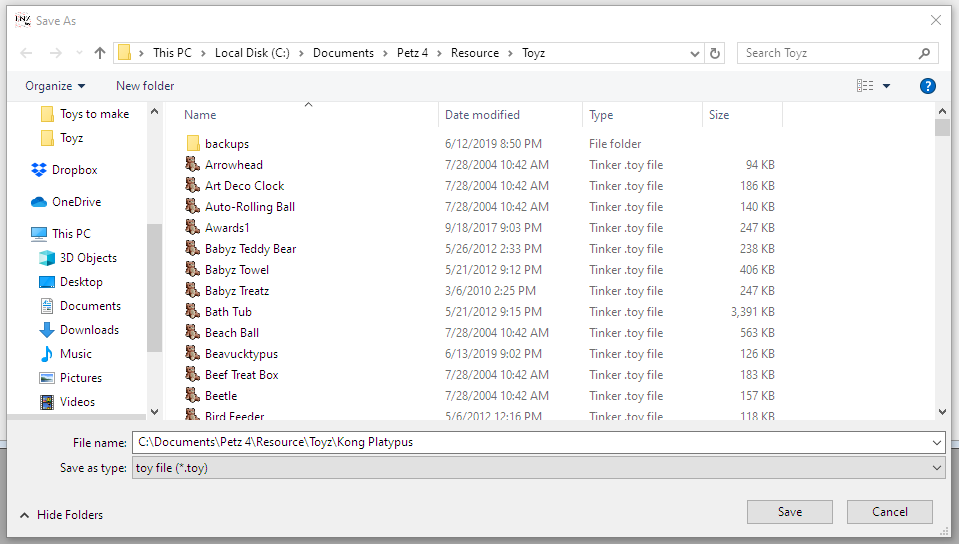

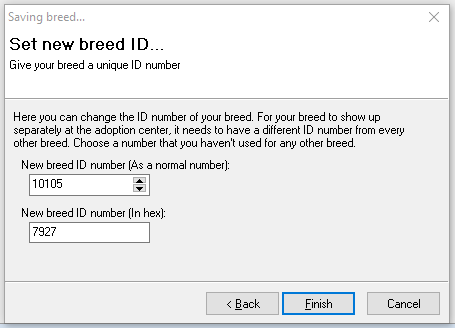
This part is trial and error. You can change either the normal number or the hex (they will update each other). You need to find a number that isn't already taken in your toy closet. This makes your toy show up separately. I sometimes use the byte generator from Random.org to get me started. Just copy two bytes and paste them into the hex number section.
Now you can open your game and search for the copy of whatever toy you choose as your base, or wait until you edit the away image of your toy to make searching easier. Up to you.
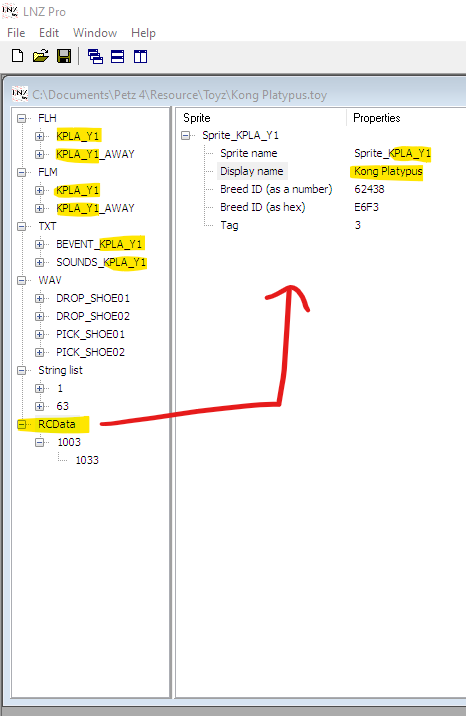
Now, expand all the drop down menus in your toy file in LNZPro. Under String List, change the name of your toy (Chewy Sneaker here) to whatever you already named it, and choose a new name for the sprite (Chew_K1 here). Capitalization matters. The sprite name must be the same number of characters as the original, for hex editing purposes.
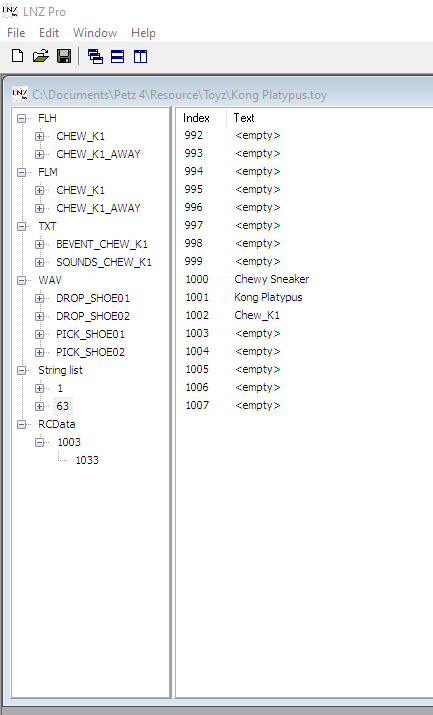
Change all instances of these two things in the LNZPro menus. Right click > Rename on the menu items to rename them. Don't forget RCData, which has the toy name and the sprite name as well. Save & exit. Make a backup of your toy at this point.
Editing in the hex editor
Open your hex editor, and open your toy. Use the Replace, Search & Replace, or similar function to find all instances of your original sprite name (Chew_K1 here) and replace it with your new sprite name (KPLA_Y1 here). Save & exit.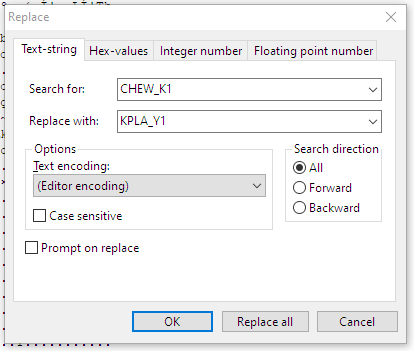
Editing in Tinker
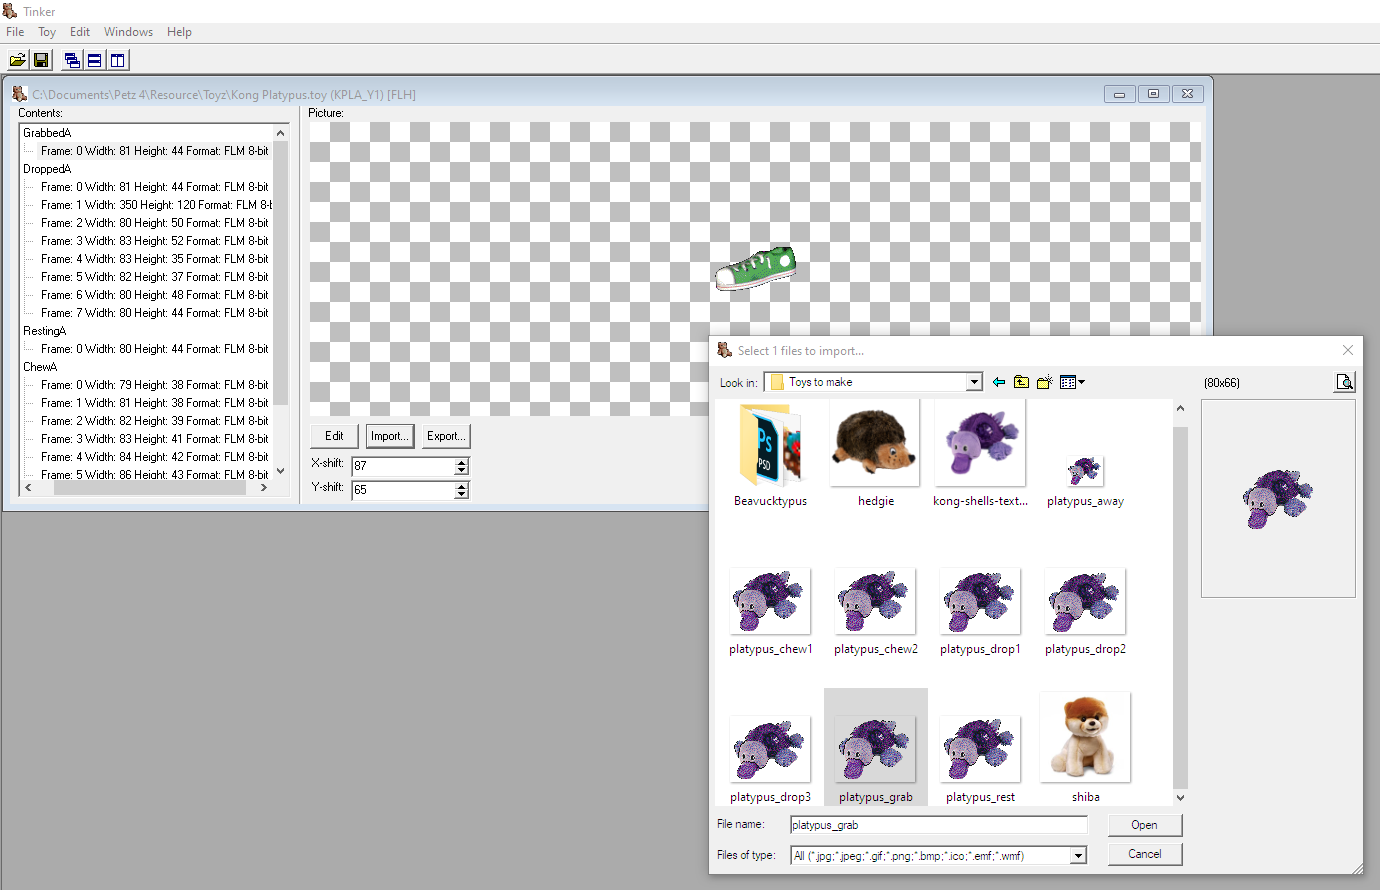
Open your toy in Tinker. Now we will edit the filmstrips of our toy. Choose to edit the regular sprite of your toy (not toy_away). Expand all the drop downs to access the animation frames.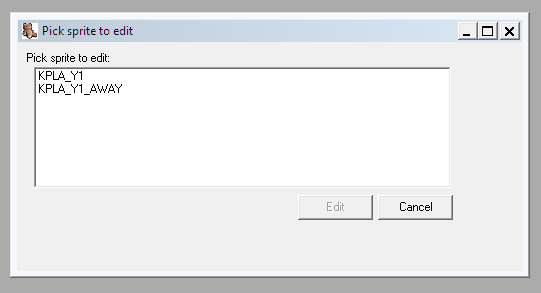
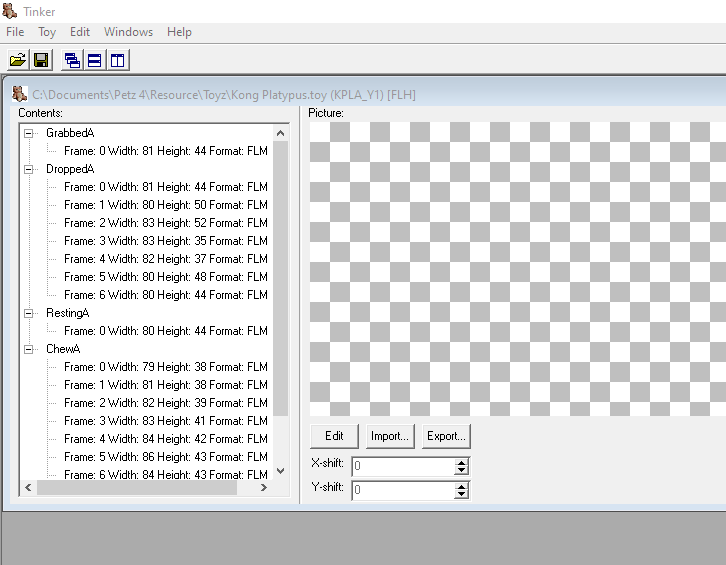
If you made just one image (frame) for your toy, replace the first frame in each drop down with that image. Delete the extras. Save. Close your file but not Tinker.
If you made multiple frames, replace the corresponding animations with your new frames. Delete extra frames. If you need to add more frames, do so with Edit > Add. You can check the animation by selecting the top of the animation branch (GrabbedA, DroppedA, etc.) and it will play. Save. Close your file but not Tinker.
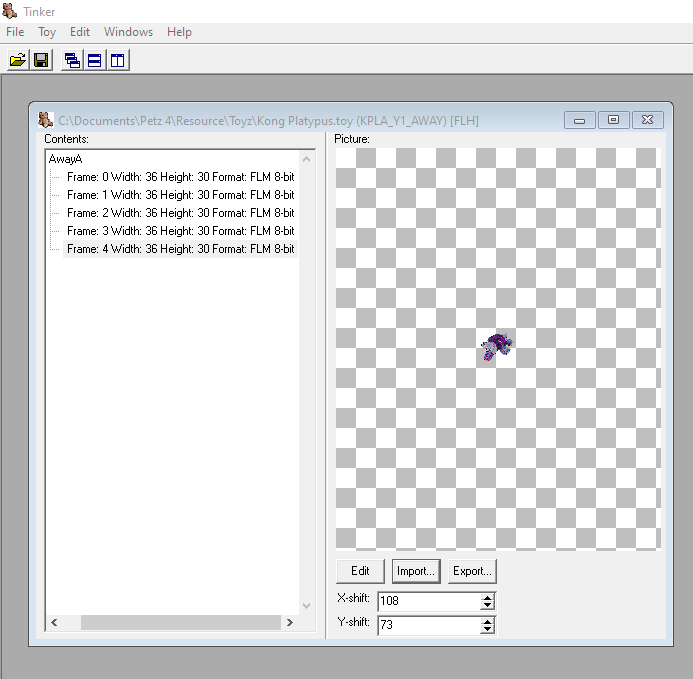
Open your toy again but select the toy_away sprite. As you may guess, we simply replace these frames with our tiny toy_away image we made. For this one, I just replace all the frames with the same image. I don't know if that matters or not. I also make sure the X and Y shifts are the same as the original toy. Save and exit.
Note: for the chewy sneaker, the first frame is.. weird. I just replace it with my normal image and adjust the X and Y shift to match the other frames. I don't know what's up with that.
Testing
Now open Petz and hope to P.F. Magic that the ID numbers you chose in LNZPro work out. If the game crashes, the toy doesn't exist, or shows up as an invisible slot, just try a new number until it shows up.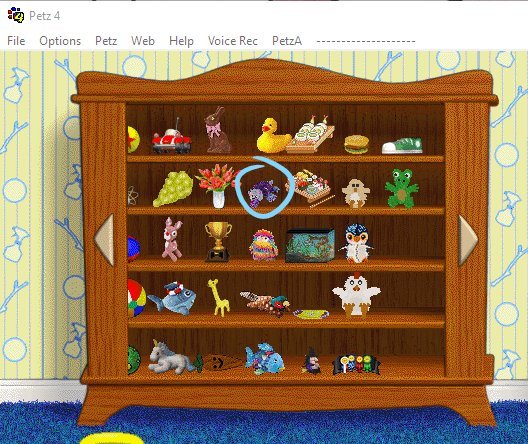
Once it works, congrats! Enjoy your new toy.